
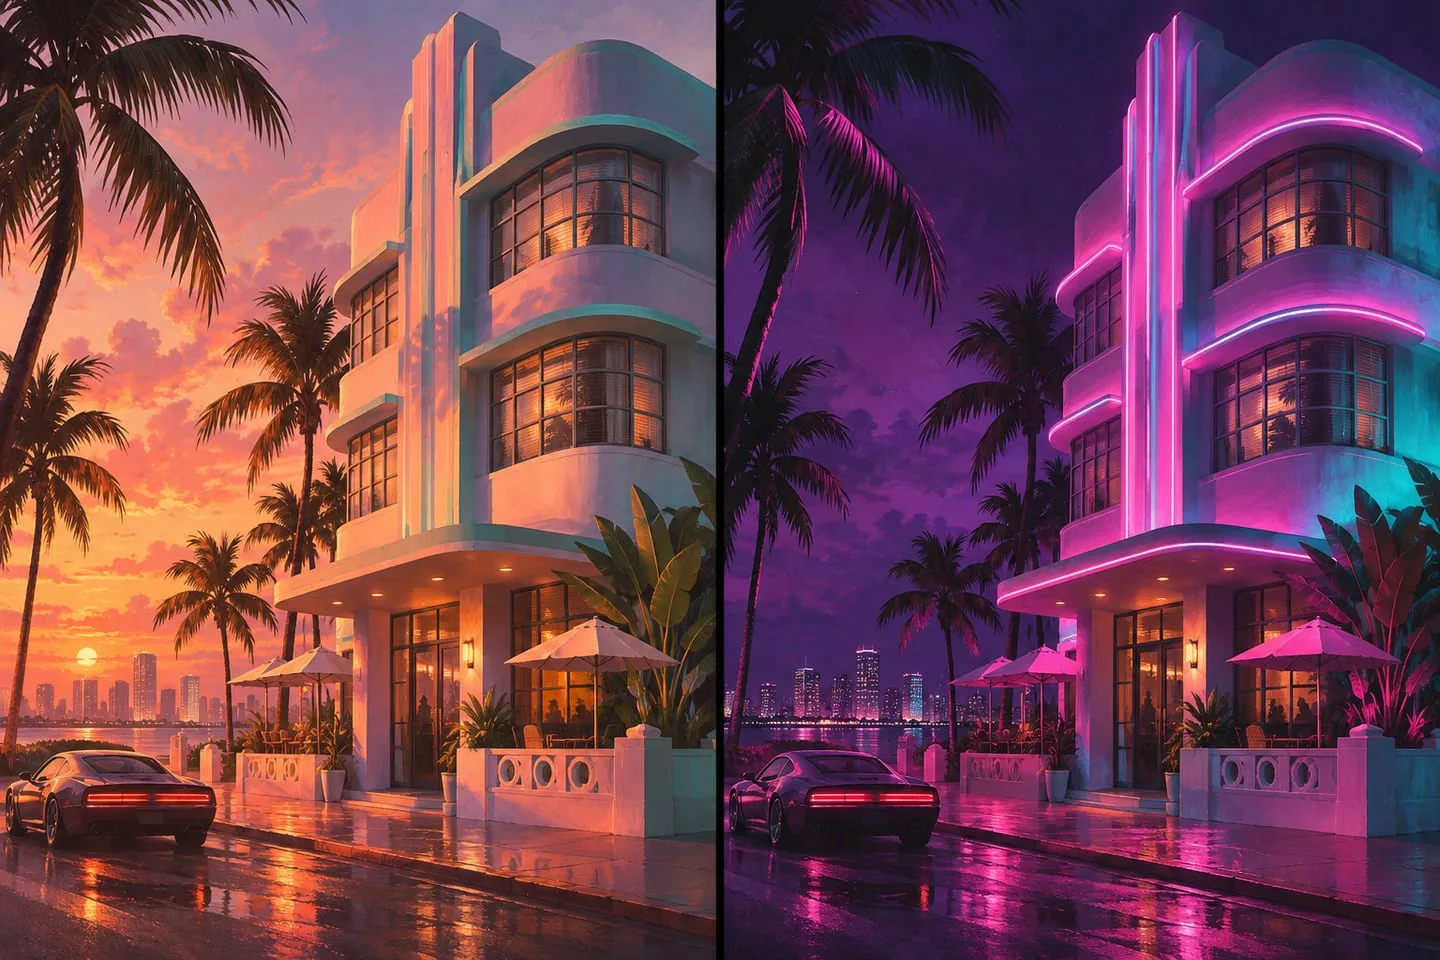
GTA 6 day and night — recognize the same Vice City location after dark
Use rooflines, intersections and permanent landmarks to compare official images when lighting changes the whole scene.
 GTA Lab3 min read
Match the structure before the light
A neon sign can dominate a night image and nearly disappear in daylight. Rooflines, road angles and bridge supports are more stable references. Start with those shapes, then use lighting to explain what changed. This makes a day-and-night comparison more reliable and reveals how much of Vice City’s atmosphere comes from the same streets seen at a different hour.
Ignore brightness for the first pass
Pick an edge that remains visible in both frames: a stepped roof, a bridge railing or the angle of an intersection. Trace those outlines before comparing the neon colors. A storefront can be much easier to recognize in daylight, while a lit sign may be the stronger clue after dark.
Check what the camera can and cannot see
Write down any obstruction such as a palm or a parked car. When one frame shows a doorway and another does not, compare the viewpoint before concluding they show different blocks. If the geometry fits but the working angle is uncertain, keep the match tentative.
Start at the hotel strip
A hotel façade with a curved corner, repeated window rows and one balcony that projects above the entrance is easier to compare than colored signage. During golden hour, the edge of the building often gives you the strongest silhouette. At night, the sign and reflected light may stand out while the roof disappears altogether.
Use Rockstar’s longer evenings as time to watch
Edge reports that Rockstar extended the day-and-night rhythm relative to GTA V. Think of a first scouting session as a chance to see the same landmark in two kinds of light. Stand in one place while it changes, and note whether the strongest orientation clue moves from the skyline to street level. Your map position did not change, even though the scene feels like a different block.
Three checks before calling two images a match
First compare permanent geometry, then the camera’s direction, then the relative position of a second landmark. Different lenses can change apparent spacing, while a crop can remove the strongest clue. Reflections and temporary traffic are weaker identifiers because they can change between frames. If the location remains uncertain, retain the regional label and explain the proposed match. The official gallery supplies the source images, and the screenshot-location guide explains how to keep a hypothesis distinct from a confirmed place.